Lab 8: Use Salesforce Health Cloud to Review Your Work
Learning Objectives
Demonstrate how Salesforce can be configured to support a Patient 360 view by utilizing the APIs that you have created during this workshop.
Step 1: Login to Salesforce
-
Login to the Salesforce Workshop environment by going to the following url https://login.salesforce.com and use the username and password provided by the workshop owner in the highlighted box.

-
Once you log in you will land on the homepage of the Patient contact center agents lightning web component app. This application is a combination / dashboard created specifically to give your agents a 360-degree view of your patients.
It shows the agent list of events from their calendar that are happening today, their open tasks at the bottom of the screen, patients that they’ve talked to, their CSAT Index ratings and the appointments that they must confirm with their open cases.
Most importantly Epic integration capability that’s provided by MuleSoft and the one that everyone has been working on so far in the workshop.
The process and systems API’s you created in the past few hours have proven to be of huge value to these agents and your organization, as it really saves everyone time to look up patients in Epic and book an appointment in Salesforce Health cloud with practitioners using multiple applications and screens.

Step 2: Search for Patients
Lets see how the agents are going to use this Lightning web component that you have created for them in Salesforce HealthCloud, using the reusable API in MuleSoft.
-
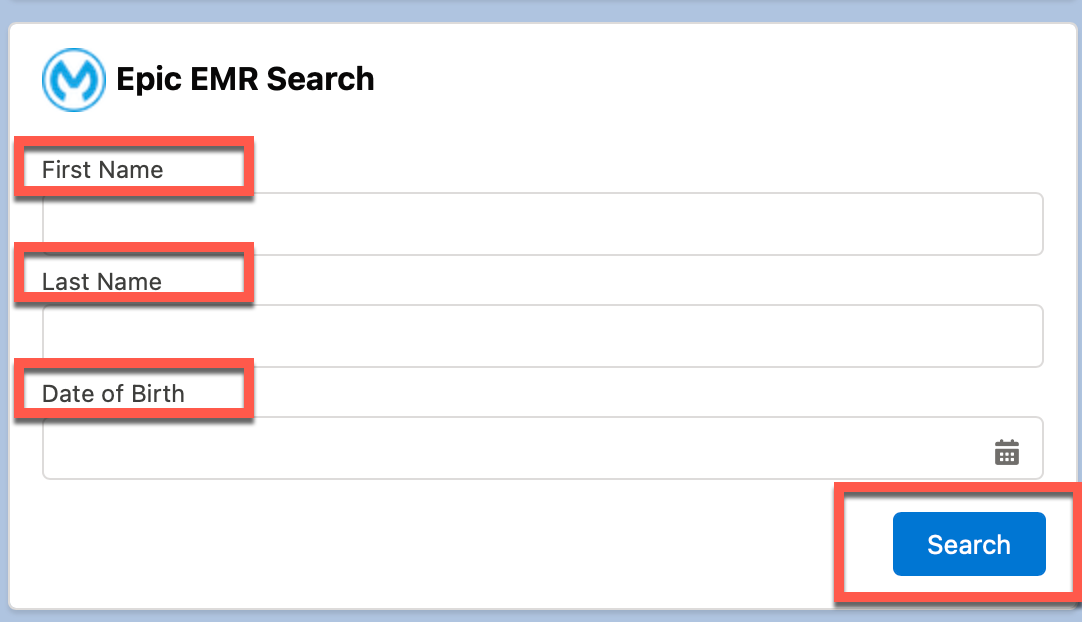
Search for patients in Epic environment using the form that you see here. They are expected to provide patients first name, last name and date of birth, before clicking on the search button on the screen.
-
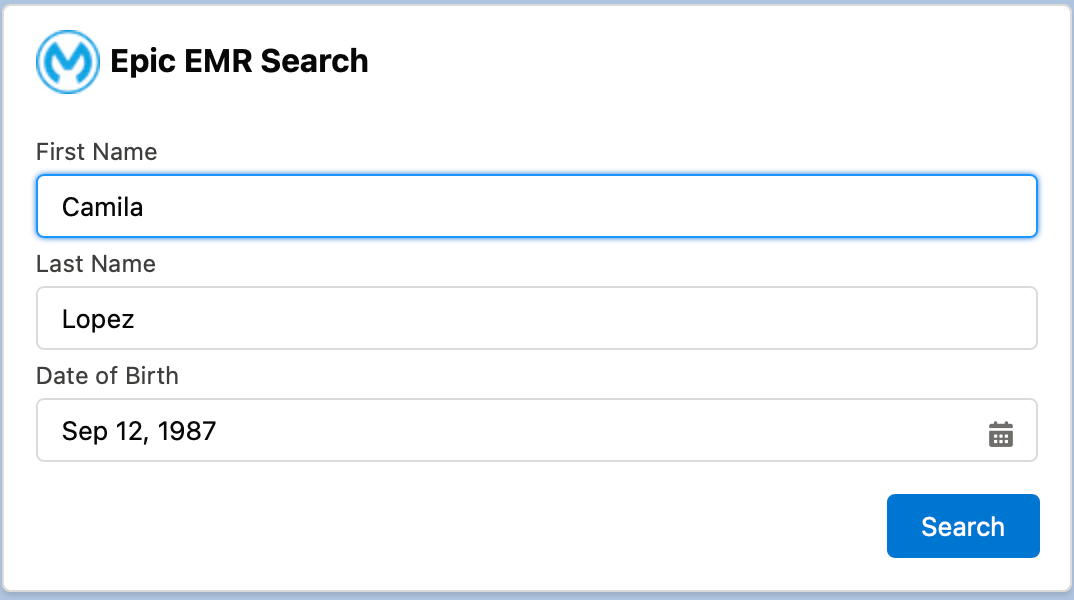
Here in this form let’s do a test search for a patient in the Epic environment, I am going to be searching for:
First name : Camila
Last Name: Lopez and
With Date of Birth as Sep 12, 1987.
Note that you can also choose the date of birth using the calendar widget on the text box.
-
Click on the search button.
-
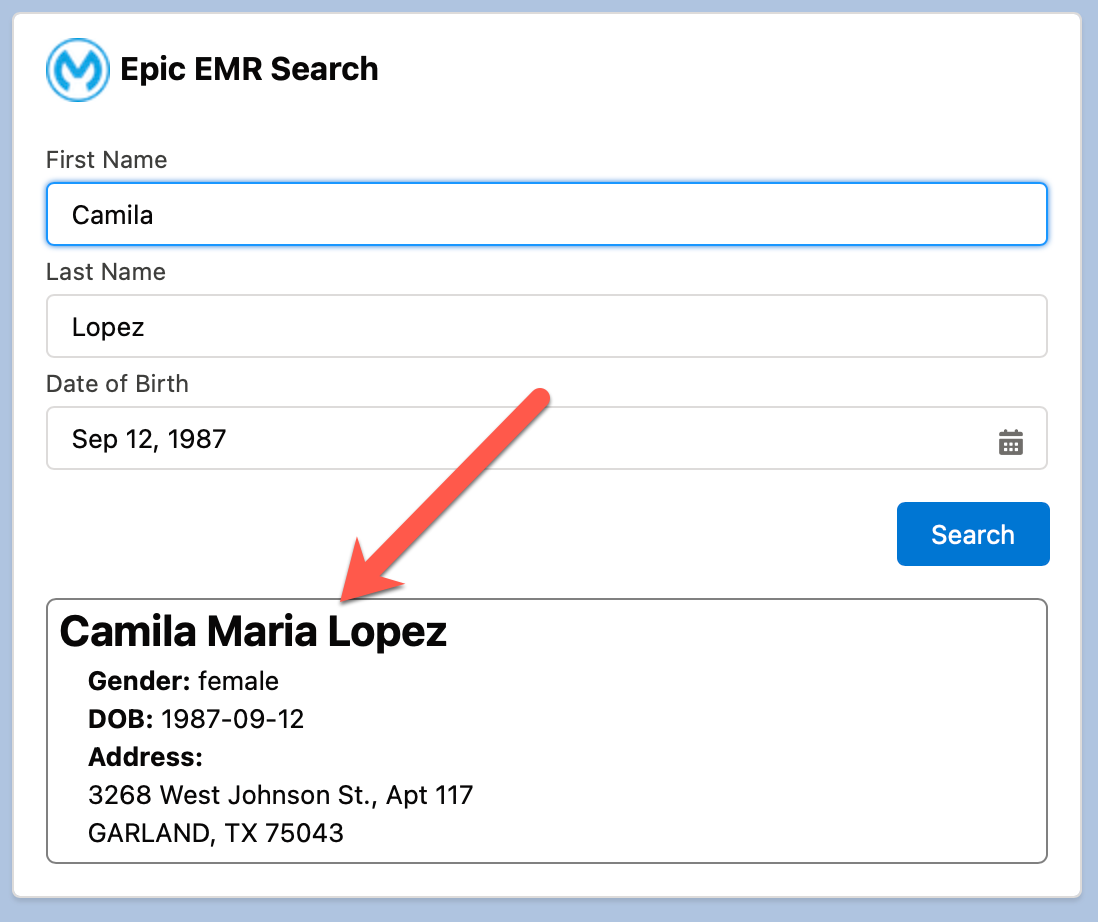
The Search is powered by MuleSoft’s Healthcare Accelerators based on Epic system API template which helps us use the search functionality via an API.
You created and deployed this API from a template provided by Healthcare Accelerators, here are the expected results of the search operation, it returned Camila Lopez with the address as shown.
Next the Agent wants to schedule an appointment with a practitioner in the Salesforce Health Cloud environment. To do that you will need click on the search result, and it will take us to the Create Appointment screen.
-
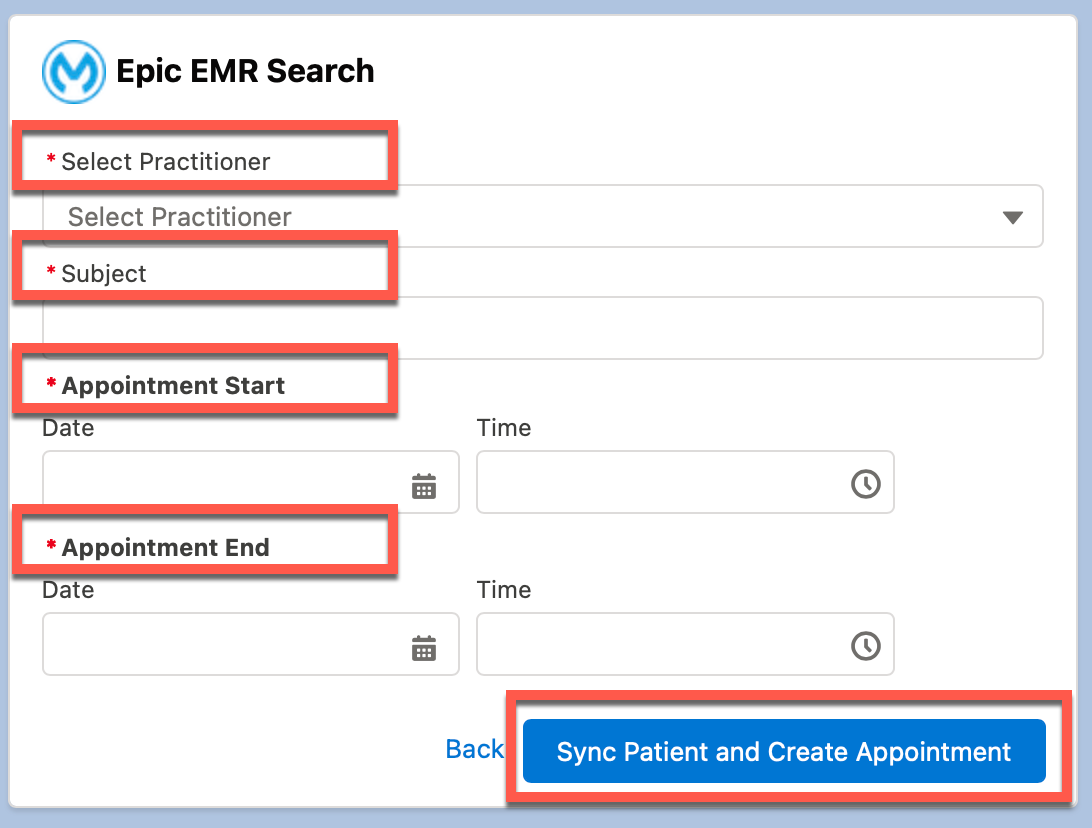
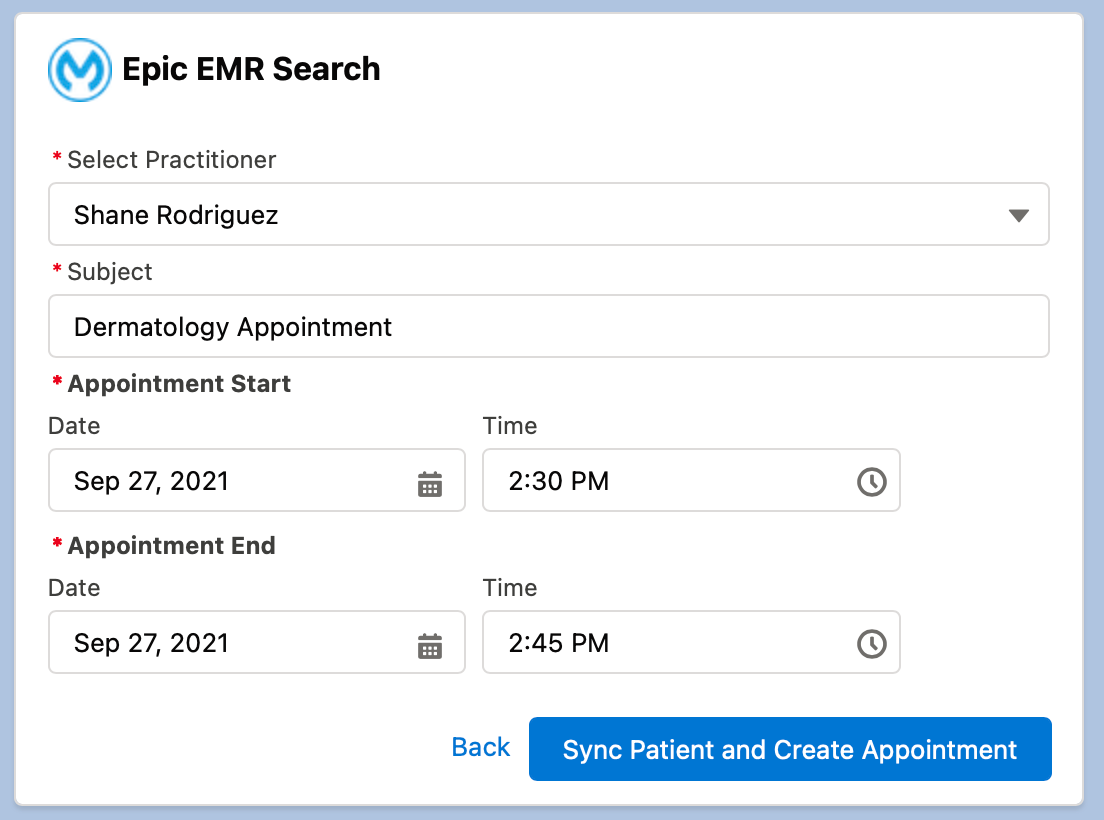
The Create Appointment screen is displayed. This screen gives the agent a list of practitioners to choose from, reason for the appointment and start and end dates and time of the appointment.
-
Select / use the following data:
Practitioner: Shane Rodriguez
Subject: Could be your name / or something unique so you can easily identify you created the appointment for Camila.
-
Enter your Appointment Start and Appointment End date and times.
-
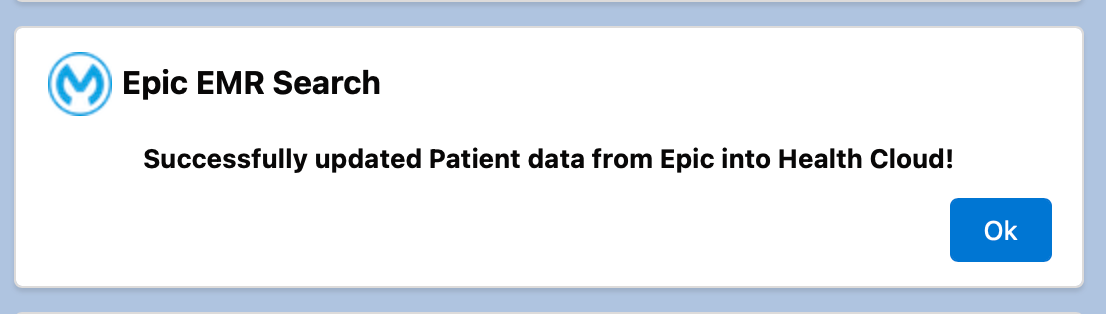
Click on the Sync Patient and Create Appointment button.
This action does two things for the agents in one click:
-
It’s going to retrieve the latest information from Epic for the Patient based on the MRN #, then it’s going to use the PUT operation to update or create a new record for this patient in the Salesforce Health Cloud environment.
-
Once that’s a success, it will create a new Appointment for the patient in HealthCloud using the information provided in this form.
Note: All of this work is done using MuleSoft’s API Led approach, Salesforce LWC components use Salesforce Experience API so that they have an easier interface to make API calls to MuleSoft API’s, the Experience API then uses FHIR based MuleSoft processes layer that does all the business logic orchestration and finally the process layer API’s use FHIR based system API’s to save and retrieve information for Epic and HealthCloud systems.
-
-
You should see a Successfully updated Patient data from Epic into Health Cloud! message.
-
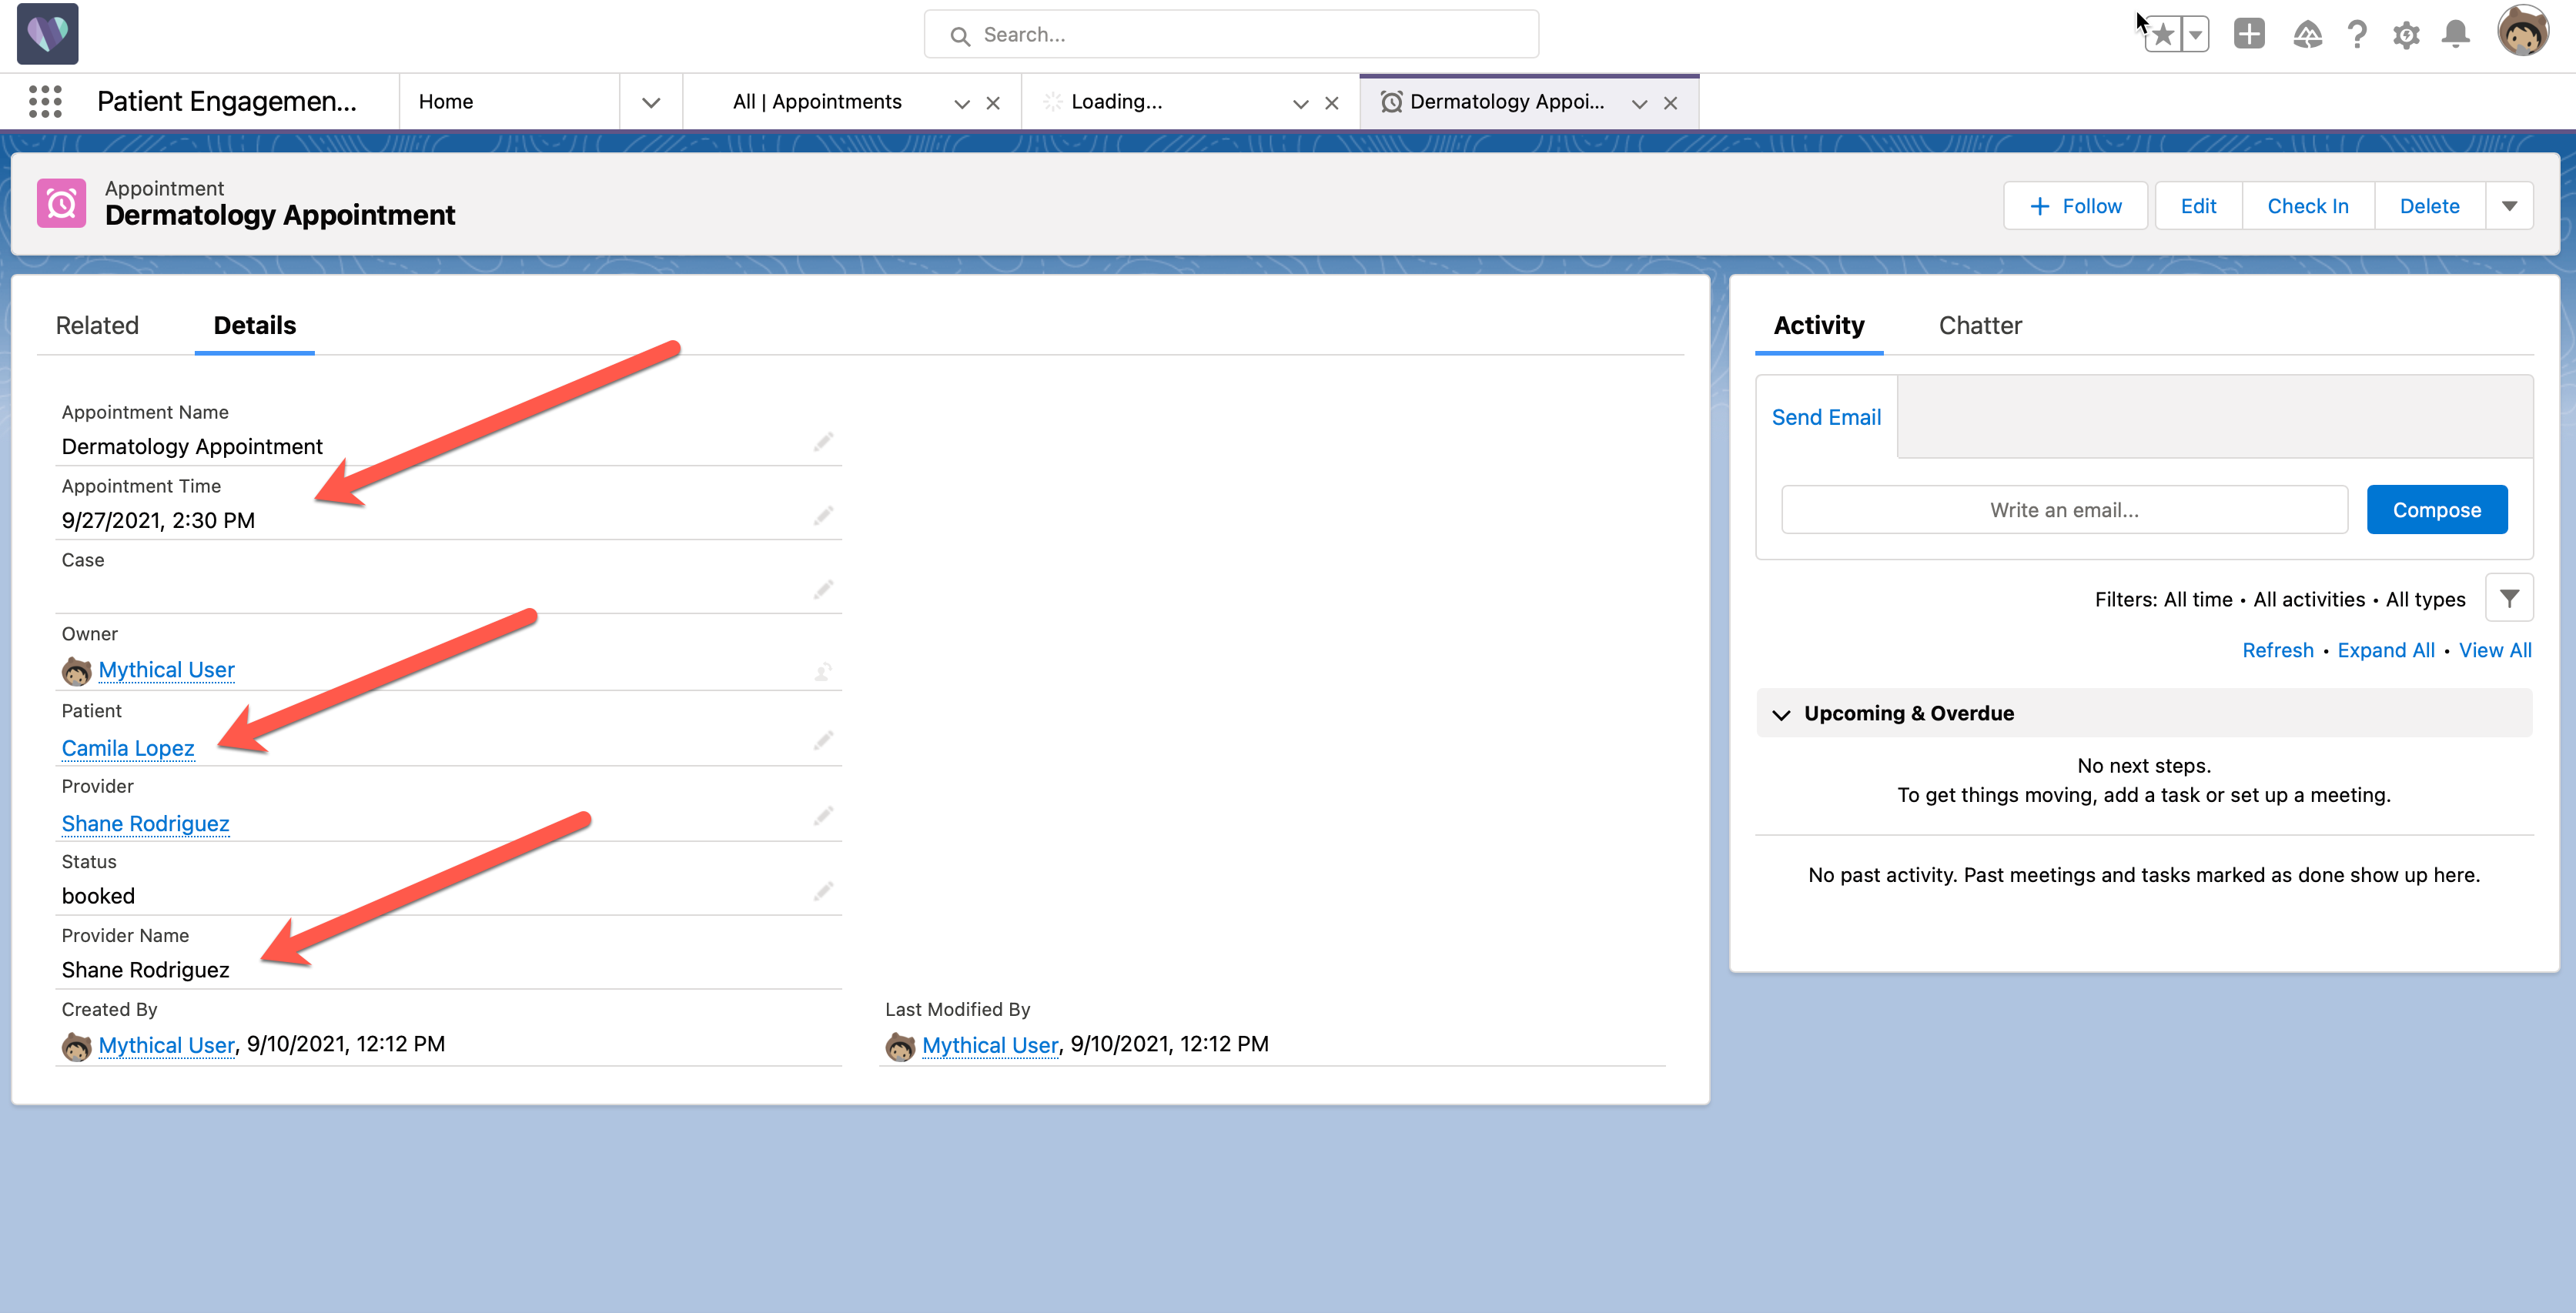
You should now see the new appointment in Salesforce.
Summary
Congratulations! You have successfully completed this workshop.
To learn more about the Anypoint Platform go to Further Exploration.